Heroku + Tracks = ♥️
- Published
- 16 June 2015
- Tagged
I've written about my Heroku + Tracks setup previously - after four months or so, it's still going strong, and it's proving invaluable as I try to keep track of everything at my new job.
However, it's one thing to write up something for yourself, and another to write it up for the internet at large. Since posting about this last, a reader emailed me asking for clarification on a couple of points - which suggests that as clear and concise as it seems to me, it's obviously not as good as it could be. In addition, a few months of use (and the occasional poke at it to get it to do what I want) have let me see that there's good and bad aspects to my setup, and a couple of alternative steps you can take.
In the interest of having a decent guide to running your own Tracks instance on Heroku, I thought I'd post a new guide: more comprehensive, shinier, and hopefully a better read.
Before you begin...
There's a couple of things you should decide on before you rush into your Tracks install:
Git or Dropbox?
Heroku lets you sync apps either via git (using the usual remote/push system for deploying code) or via a shared folder in Dropbox. Both of these options have their advantages and disadvantages:

Pick your poison.
- Git deployment means you keep a robust, versioned backlog of every change you make, pretty much forever. If you use git during your day job this option is pretty awesome. No middle-man, no third account needed: just you and Heroku. However, heroku will always host the master branch of your repo, and syncing a branch to a branch of a different name (i.e. syncing your local branch my-awesome-hacked-tracks to the remote branch master) seems tricky?
- Dropbox deployment means that you need to copy changes to a folder on dropbox, and Heroku effectively pulls changes from that folder to the server. While this is usually simpler than managing your application via git, I've found that putting a git repo in Dropbox can cause...interesting problems.
I'm currently using a combination of git and dropbox for my home install of Tracks, but this is mainly because of history. For a new install, I'd recommend using git to deploy your app. I'll go through the commands you need to know, as you need to know them.
Bleeding edge or stable release?
The second choice you'll need to make is whether to keep as up-to-date as you possibly can be, or to run with the latest stable release of Tracks.
The latest stable release of Tracks is available as a zip file on the Tracks website, which makes downloading really easy. If you want to keep up-to-date, you'll want to clone the Tracks github repo. This would usually be tricky, but if you're using git to deploy the app, you're already halfway there. If you're determined to avoid git (and you just want to download the stable release to your dropbox folder), go ahead! You should hopefully be able to make the appropriate changes based on these instructions.
Let's do this
Here's what we're going to do:
- Set up the heroku app
- Download Tracks to your computer
- Modify Tracks to run on Heroku
- Upload and test out
Step 1: Set up the heroku app
Heroku is a cloud-based "platform as a service". It has some pretty nifty features, but what's most awesome for us is that you can get a very limited account for running ruby/rack-based apps (such as, you guessed it, Tracks) for free. It's not particularly amazing - your database space is very limited and you'll notice long refresh times - but you get what you pay for.
Once you sign up for a Heroku account, you'll be presented with the dashboard, which displays all your current apps:
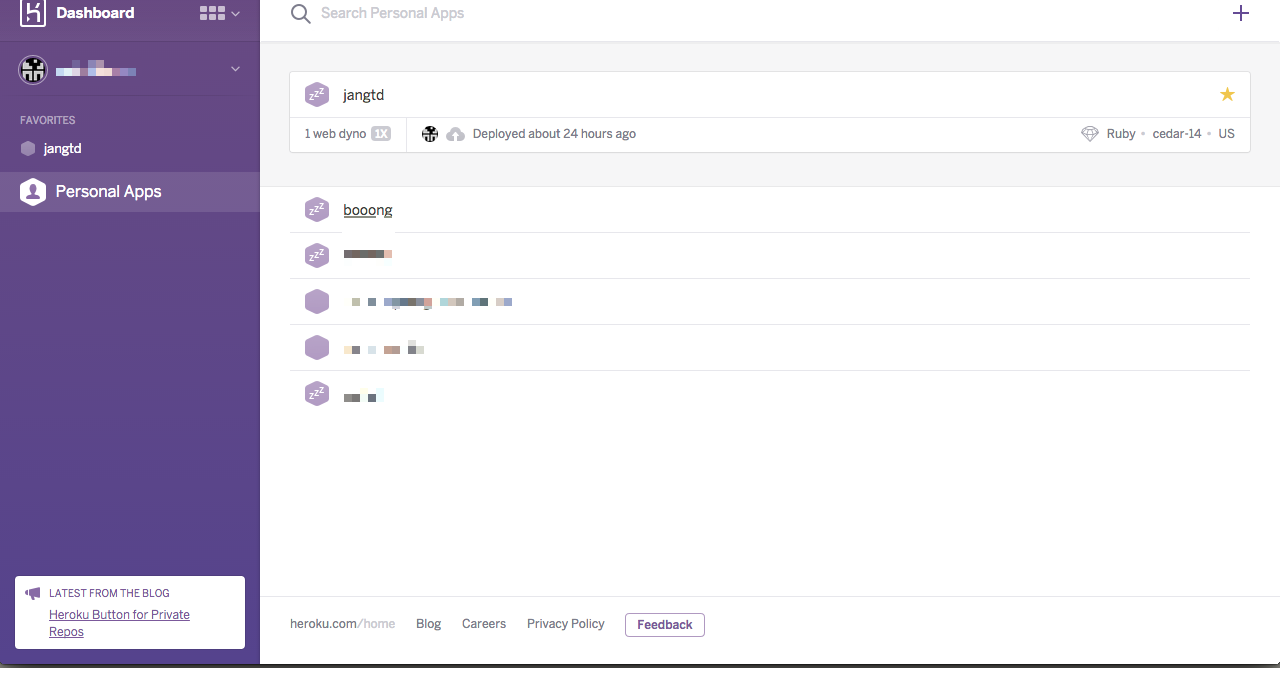
You will obviously have less apps on your dashboard than this.
Click the plus up in the top-right-hand corner to create a new app. Give it a name, and pick where it should be hosted.
Each app has its own page, which looks something like this:
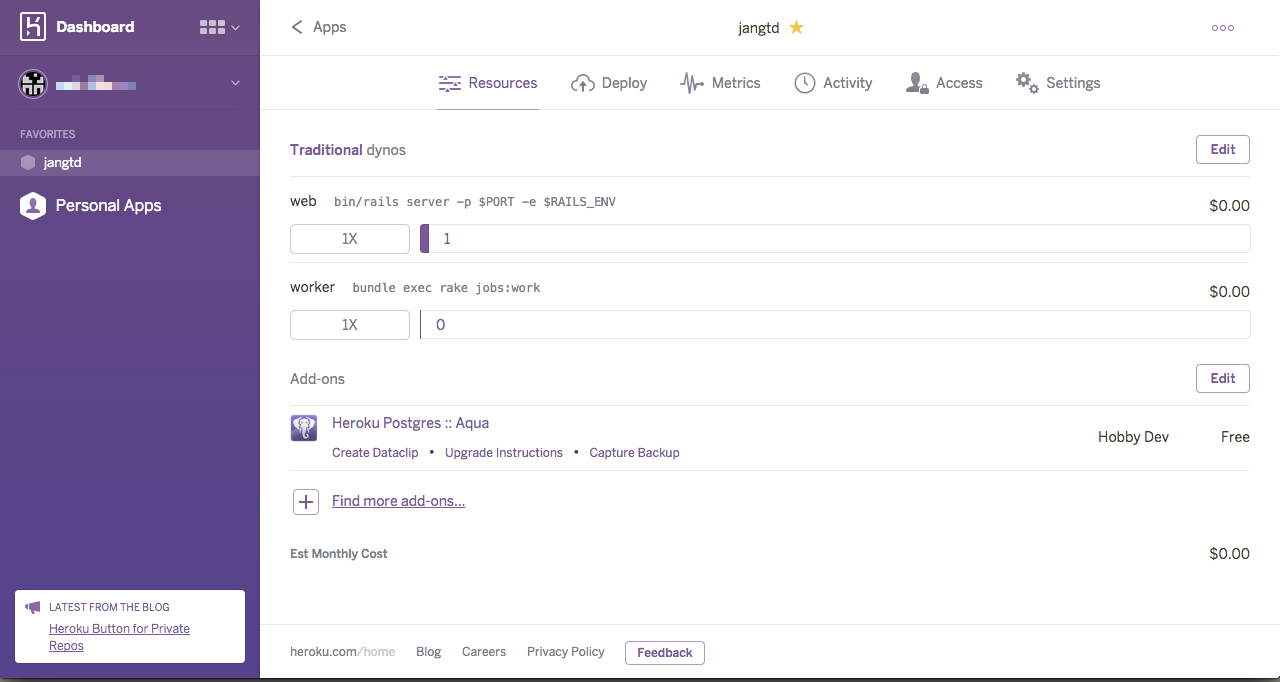
The home screen for jangtd, my Tracks instance.
You can access a lot of things from this page, and we'll be returning to it a few times. For now, head over to the Deploy tab in the app proper, and pick your deployment method. If you want to go with Dropbox, you'll need to connect Heroku and Dropbox: it'll create a new folder under /Apps/Heroku, and drop a folder in there for your new app. Anything you put in this folder will get deployed to the server any time you hit the "Deploy" button on this page.
Assuming you want to use git, you'll see something like the following:
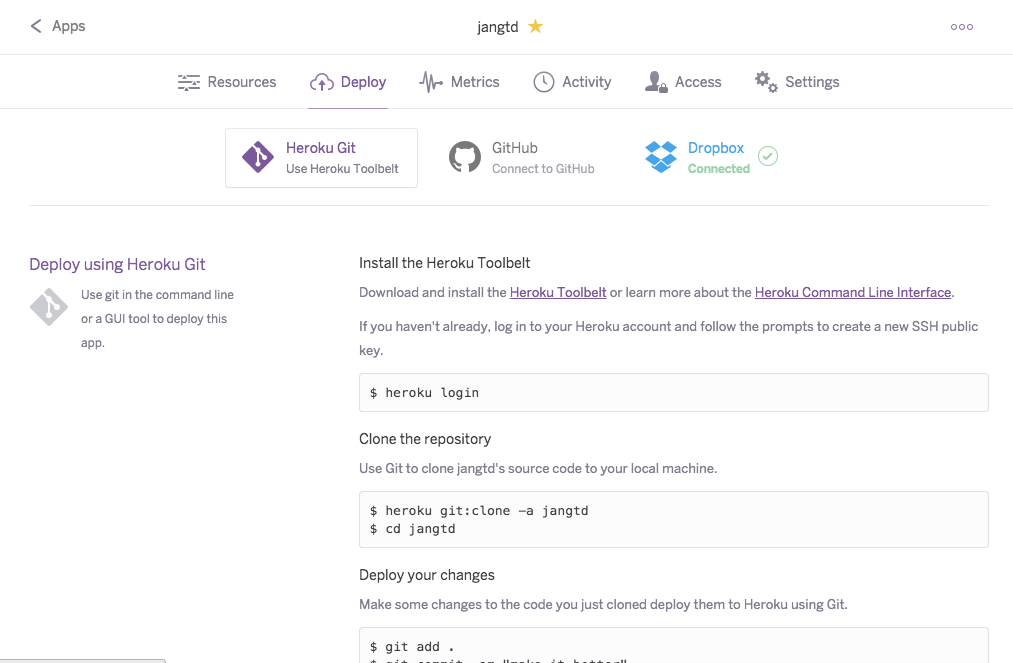
Deploying via git
In order to deploy, you'll want to download and install the heroku toolbelt. Actually, go ahead and install that even if you're planning on deploying via Dropbox. It gives you access to a whole heap of handy features that are invaluable when your app refuses to start.
A word about add-ons. Your app does not come with a database by default. You'll need a database to store all your data, so let's set ourselves up with something small and free. Head to the Resources tab and under the Add-ins section, click the plug on the left to find the "Heroku Postgres" addon:
Usually, this is the point where you'd be diving into the Postgres addon to get information about the database's url, port, username, password, and so on, but Heroku does something particularly clever to avoid the hassle of inserting this into your app. If you go to the Settings tab and check out your config variables, you should see that the variable "DATABASE_URL" is filled out. In the absence of other information, Heroku will load this info into your config/database.yml file. We're going to let Heroku do just that.
Step 2: Download Tracks to your computer
Your next step is to actually grab Tracks and put it in the right place. If you're going to be running the latest stable release, download the zip file from the website and unzip it wherever you'd like. Otherwise, you can grab from git pretty easily, using Terminal:
cd YOUR_FOLDER_HERE
git clone https://github.com/TracksApp/tracks.git .
(All future Terminal commands will assume you're in this directory, unless specified otherwise. Don't miss that full-stop - it makes sure you clone the repo into the current directory, and not into a directory within this directory.)
Step 3: Modify Tracks to run on Heroku
You're almost ready to go, but there's a couple of last changes you'll need to make. For a start, Heroku really doesn't like sqlite3 at all, so we're going to remove that and the mysql gem. We'll also modify the Gemfile slightly for Heroku's benefit, as well as adding in a configuration file.
Heroku traditionally doesn't like people using sqlite as a database, to the point of net letting apps require the default sqlite3 gem. This is a problem because in Tracks' Gemfile[1] the sqlite gem is listed as being required.
We could get around this by deleting the gem from the Gemfile, but I'm going to do something else: I'm going to put it in its own "development" group. By default, Heroku won't install any gems you put in the "development" or "test" groups, so it'll skim right over the sqlite install.
Open up the file "Gemfile" in your favourite text editor. Around line 19 you should see the following:
# you may comment out the database driver(s) you will not be using.
# This will prevent a native build of the driver. Building native drivers is not
# always possible on all platforms
# Alternatively use --without <group> arguments to bundler to not install that group
gem "sqlite3", group: :sqlite
gem "mysql2", group: :mysql
We're going to edit this so that it looks like the following:
# you may comment out the database driver(s) you will not be using.
# This will prevent a native build of the driver. Building native drivers is not
# always possible on all platforms
# Alternatively use --without <group> arguments to bundler to not install that group

group :development do
	gem "sqlite3"
	gem "mysql2"
end

group :production do
  gem "pg", "~> 0.18.2"
  gem "rails_12factor", "~> 0.0.3"
end
We've excluded sqlite3 and mysql2 from the usual install, and we've also added the gem rails_12factor, which Heroku likes to have installed, and pg, which is an adaptor for the postgres database we installed earlier. While we're editing this file, also add the following as the first line:
ruby "2.0.0"
This lets Heroku know which version of ruby we want. Finally, install the gems in Terminal using bundler:
gem install bundler #Not required if you already have bundler installed, obviously
bundle install
The next thing we need to do is instantiate some YAML configuration files. Heroku will auto-generate a valid file instead of config/database.yml[2], but we still need a site.yml, which will set a few important variables about your site.
You'll find an example file under config/site.yml.templ. Make a copy of that and rename it to config/site.yml. Have a quick read through and alter any values you want to alter. The main ones you might need to change are time_zone and secret_token.[3]
You may think we're done - but you'd be wrong. We have one last change we need to make before we can try deploying, and that's to make git acknowledge the presence of our new site.yml file. Since this file contains confidential information that you don't really want to broadcast, it's ignored by default; we want to push it to Heroku, however, so we'll turn that off.
The list of files that git should ignore is stored in a file called .gitignore. The dot at the start means the file is hidden, so you can't just open it from Finder. You can open it from Terminal, however:
open .gitignore
Alternatively, if you want to open it with a specific program:
open -a "AppNameHere" .gitignore
You will see a list of filenames in this file - about line 22 you should see config/site.yml. Delete that line and save the file.
Once you've made all your changes, you'll need to make a commit. A commit is git's way of grouping changes into nice little sane blocks. First, add all the recently changed files using the git add command:
git add -A .
This should add the .gitignore file, the Gemfile and Gemfile.lock files (you made the lock file when you ran bundle install), and the new config/site.yml file. You can check the status of the new commit as it stands by running git status.
To actually make the commit, run the following:
git commit -m "Your commit message here"
With this, your commit has been packaged up, and you're ready to send Tracks over to Heroku.
Step 4: Upload and test
We should be ready to push this thing to the web now - but first we need to tell it where to go. Thankfully, this isn't too hard. You installed heroku toolbelt before Step 1, right? In that case, you should be able to add your heroku app as a remote:
heroku login
> Enter your heroku credentials.
> Email: your@email.here
> Password: ******
> Authentication successful

heroku git:remote -a your-heroku-app-name
You should now be able to deploy your app:
git push heroku master
This will take some time. With luck and patience, it should go well.
One final thing you need to do: set up your database on the other end. You can get Tracks to do this by running the setup command through heroku:
heroku run rake db:setup
heroku automatically knows which app to run this on because you're in a directory that's linked to an app. If you're not in this directory, you'd have to specify the app:
heroku run rake db:setup --app your-app-name
Step 5: Recap
So what have we done?
- We made an account on Heroku
- We added a Postgres database plugin
- We ensured that the Heroku toolbelt was installed
- We downloaded Tracks from github
- We made some alterations to get it ready for Heroku
- We put
sqlite3andmysql2into the development group - We added
rails_12factorandpginto the production group - We specified the ruby version at the top of the Gemfile
- We installed gems from the Gemfile
- We created
config/site.ymland set the time zone and secret token - We modified the
.gitignorefile so that git would notice the site config file - We added all our changes to a commit
- We put
- We uploaded it to Heroku
- We logged in to Heroku via the toolbelt
- We added the app as a remote to our git repo
- We pushed the code to Heroku
- We set up the databse on Heroku
There remains one thing to do: to see if this whole thing worked. Navigate to http://your-app-name.herokuapp.com and see what you see.
Wait! Something went wrong!
Turns out there's all kinds of things that can go wrong when you're deploying an app like this. Unfortunately, it's a bit harder to debug your app when it's running on Heroku's servers than when it's running locally. If your app is crashing, you can get logs by running the heroku command-line tool in terminal. To view the latest logs, use the following Terminal command in your app's local directory:
heroku logs
The logs are often a bit chaotic because of backtraces, but with any luck you'll be able to find out what's going wrong.
Upgrading
What happens when a new release comes out and you want to upgrade?
If you're just downloading zipped copies from the website, you should be able to delete everything (keep site.yml and your gem file!) and unzip the new files into the folder. Since your data is being stored on the database (which isn't part of the dropbox folder) you won't lose your progress. However, it's a bit more cumbersome than it could be.
If you're using a git repo, all you need to do is navigate to the folder in terminal and run:
git pull origin master
You will get a warning that you'll need to merge files (remember those changes we made to files? Git now has to merge those changes with the changes from the update). This will usually go smoothly, but sometimes you might need to dig into a file and resolve a conflict or two. This is the most complex git stuff you'll (hopefully!) have to deal with, and is a bit outside the scope of this tutorial. You should be able to find information about resolving conflicts in git elsewhere on the internet, however.
Conclusion
So there you go. With any luck you now have a remote instance of Tracks running on Heroku. Or you don't, at which point there's a comment box below this paragraph. See it? Put something there. Go on. Tell me what didn't work.
Otherwise: congratulations! You're now a productive member of society. Now stop messing about with code and go do something.